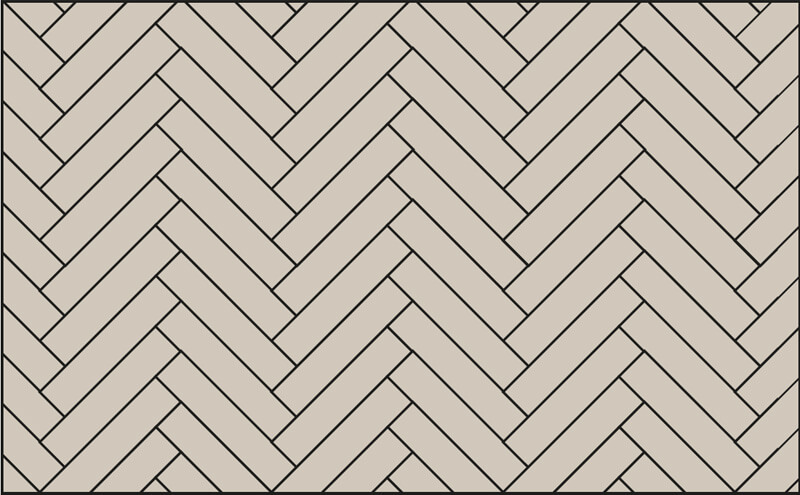
How to Lay Herringbone LVT Glue-Down Flooring
Jump straight to:
> Tools You'll Need
> Your Installation Options
> Getting Ready to Lay Your Floor
> Installing Your Floor
> Finishing the Look
> Forgotten Something?
> Your Flooring is Finished!
or Download the guide as a PDF
Tools for Fitting Your Glue-Down Herringbone LVT Floor
To install this floor yourself, you’ll need some tools to help with the job.
Have these to hand:
- Tape measure
- Spirit level
- Marker pen (if installing with self-adhesive underlay)
- Chalk (if installing with adhesive)
- Tape (for securing tiles as you work)
- Workbench or sawhorse
- Underlay and underlay tape (if installing with self-adhesive underlay)
- Flooring tiles
- Heavy floor roller - we recommend it weighs at least 50kg
- Spacers
- Stanley knife
- Handsaw or chop saw
- Chisel (for fitting around architrave)
- Drill (for covering pipework)
- Moisture meter – the correct type for your subfloor
- Combination square
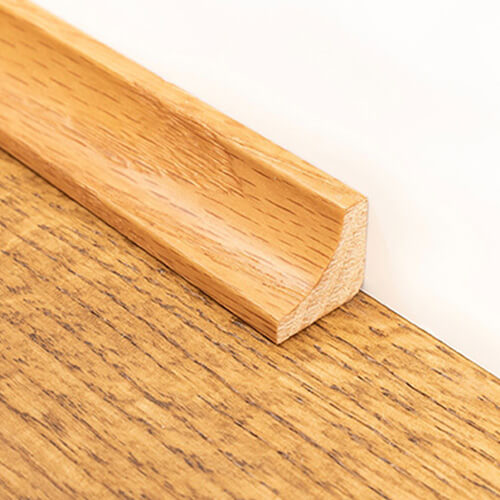
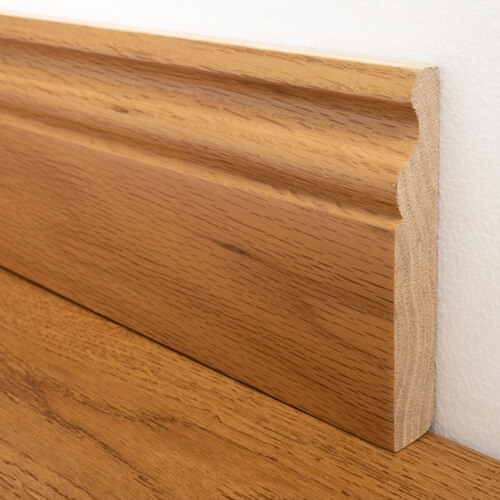
- Beading or skirting boards (to finish the look)
- Dryback adhesive and notched trowel (if using glueing installation method)
- Safety equipment i.e. knee pads, safety goggles, dust masks, ear defenders
- Cutting templates for awkward shapes (optional)
Some of these tools are available through our website.
Your Installation Options for Glue-Down Vinyl Flooring
Note: Fitting parquet flooring can be quite complicated and relies on precise measurements, so if you're not feeling confident, we recommend hiring a professional fitter.
Installation with Adhesive
This installation method involves applying adhesive to the subfloor and then laying your flooring on top.
Installation with Self-Adhesive Underlay
This installation method involves laying self-adhesive underlay over your subfloor and securing your subfloor to the adhesive surface.
Getting Ready to Lay Your Floor
1. Check everything looks good
When your flooring arrives, start by opening one box to check you’re happy with the floor.
Some of our wood-effect vinyl flooring is designed to look just like real wood, which means there may be some colour variation between the planks and batches. When you get to laying the floor, you can make the most of these colour contrasts by mixing and matching planks with different shades to get a lovely natural look.

2. Acclimatise the boards
It’s important to leave your flooring in the room it’s going to be fitted in for at least 48 hours. It’s fine for it to stay in its packs during this process. You can either stack the packs or lay them on the floor, but they must remain horizontal, and the weight of the packs must be distributed evenly. Keep the temperature of the room between 18-27 degrees throughout the acclimatisation period. If you’re using underfloor heating, gradually increase the temperature so the tiles acclimatise to the heat. Please read our underfloor heating tips below for more information.

Note: This glue down LVT flooring can be fitted over warm water underfloor heating systems only. The surface temperature must not rise above 27°C. If you can’t guarantee the temperature your floor will be exposed to, we recommend using a two-component adhesive for extra stability.
Important Info
- Don’t turn off your heating system after installation, or allow it to switch off automatically, as small gaps or cracks may appear when the floor cools and contracts. A dispersion adhesive usually takes around 72 hours to set fully, depending on your room temperature and humidity. During this period, it’s essential to keep the floor warm and avoid sudden drops in temperature.
- If your system also provides cooling, it must include condensate protection. This means that the water running through the pipes stays within 3°C of the room’s air temperature, preventing damage from moisture or temperature changes.
- Electric underfloor heating is not compatible with this glue down flooring.
- Floor heating systems installed before 1990 should not be used, as they typically reach higher temperatures that can damage the flooring.
3. Prepare the subfloor
Before laying your new floor, make sure to remove any existing flooring and prepare the subfloor so it’s clean, dry (for concrete, this means a maximum 2% moisture content), and level. For the best results, we recommend using either a concrete or wooden subfloor. The subfloor should have a surface regularity that meets the SR1 standard (3mm in 2m reference BS8203).
If your subfloor consists of joists, you’ll need to lay a sheet of plywood on top to create a stable, even base before fitting your floor.
Choosing the right plywood:
| JOIST SPACING | PLYWOOD THICKNESS |
| 40.6cm | 19mm |
| 48.7cm | minimum of 19mm |
| 60.9cm | 22-28mm* |
Once the plywood is in place, double-check that the subfloor is level.
Use a moisture meter to ensure the subfloor is dry enough before installation. If you’re working with concrete, it must be completely dry. A damp-proof membrane should be laid over the subfloor to prevent moisture from affecting the boards—this helps avoid expansion or buckling. (Many modern underlays now include built-in damp-proof membranes.) Make sure any screws or nails are fixed below the surface so they won’t puncture the underlay. Remove old adhesive and thoroughly vacuum the area to clear dust and debris.
4. Plan the layout
Consider the direction you want your tiles to run. As a general guideline, laying the boards parallel to the longest wall usually creates the best result. It’s also worth thinking about the shape of the room— in a square space, aligning the boards with the flow of natural light can produce a beautiful finish.
An Important Note
Your flooring should be one of the final steps in any renovation. Work from the top of the room down, so by the time you’re ready to install the floor, there’s less risk of causing damage. Be sure to install any fixed units, such as kitchen cabinets or islands, before fitting your flooring.
How to Lay Herringbone LVT Glue-Down
Dryback Adhesive Method
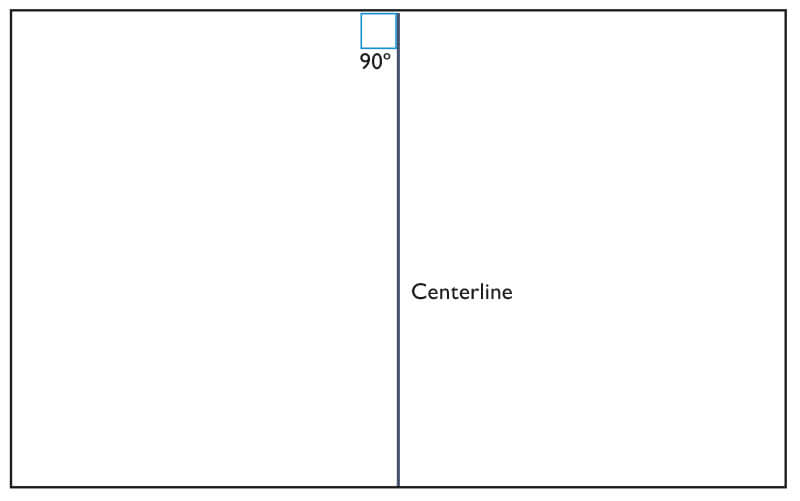
1. Start by finding the centre of your room from the perspective of your starting wall. Draw a chalk line straight across the floor, making sure it’s perpendicular to the starting wall. This will be your main guide for laying your herringbone floor.
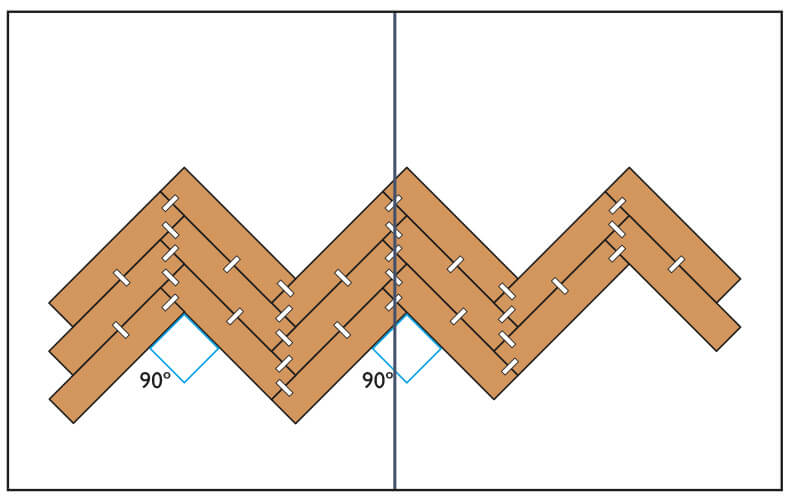
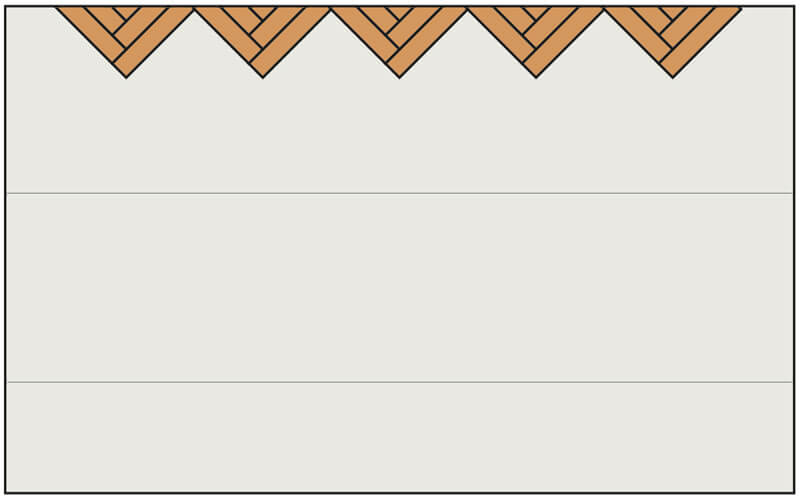
2. Lay out two to three rows of your tiles in the herringbone pattern, making sure all corners form perfect 90° angles. Use tape to hold the tiles in place so they don’t move.
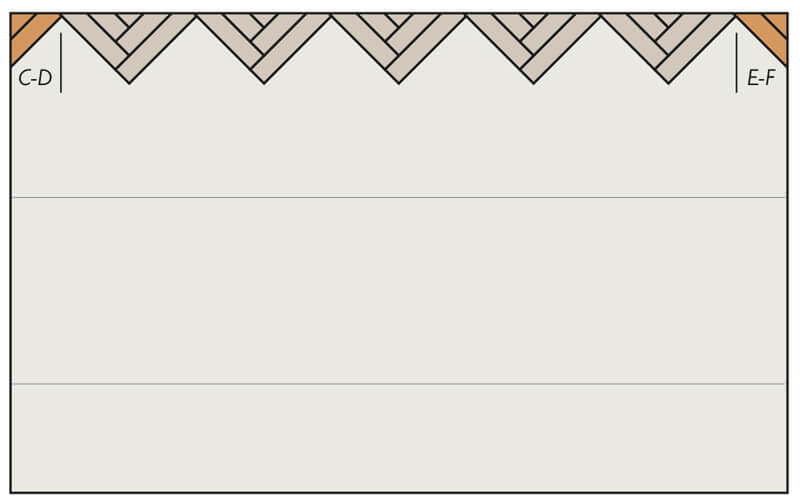
3. Place this assembled section against your starting wall, aligning the points with your centreline (this should look like the image above). Double-check that your corners are still 90° and that the distance to the starting wall is even all the way across the room.
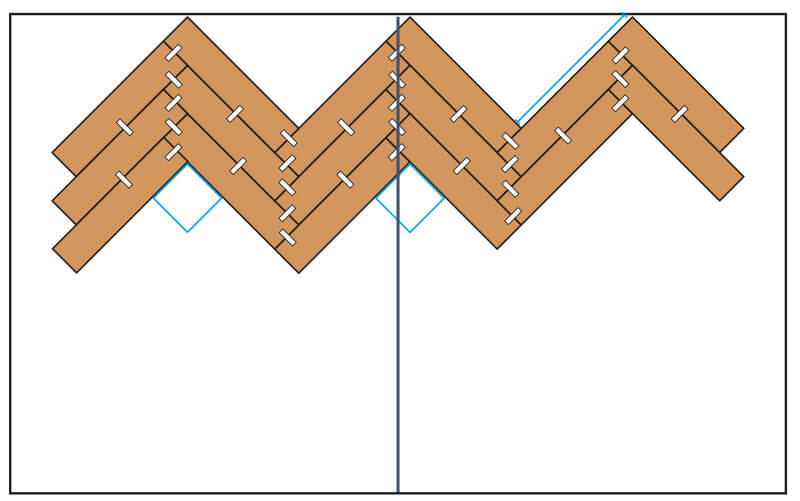
4. Prepare your adhesive according to the manufacturer’s instructions, following the recommended quantity, waiting time and setting time. Use a notched trowel to spread the adhesive evenly across a section of the floor wide enough for two or three strips (the dark tiles in the image)
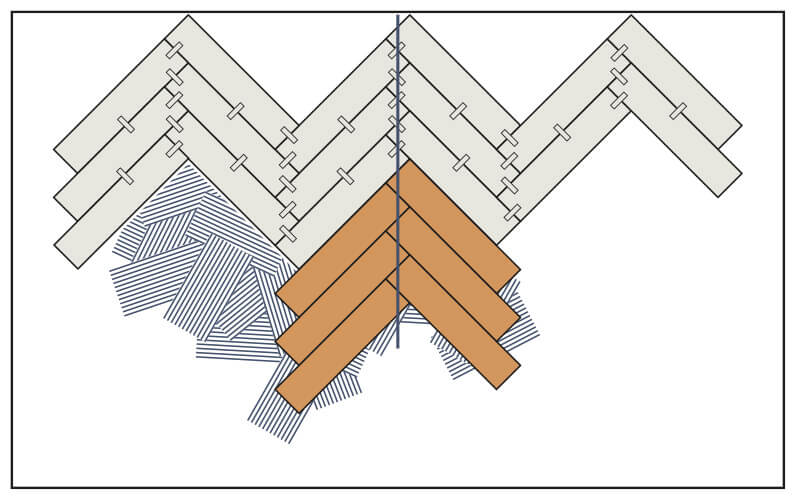
5. Gently place your pre-assembled strips into the adhesive and roll them immediately to secure them into place. Make sure you’re working within the adhesive’s recommended open time. Continue the process, moving outwards from your starting strip on both sides. Keep checking that all your corners are still exactly 90° as you go.
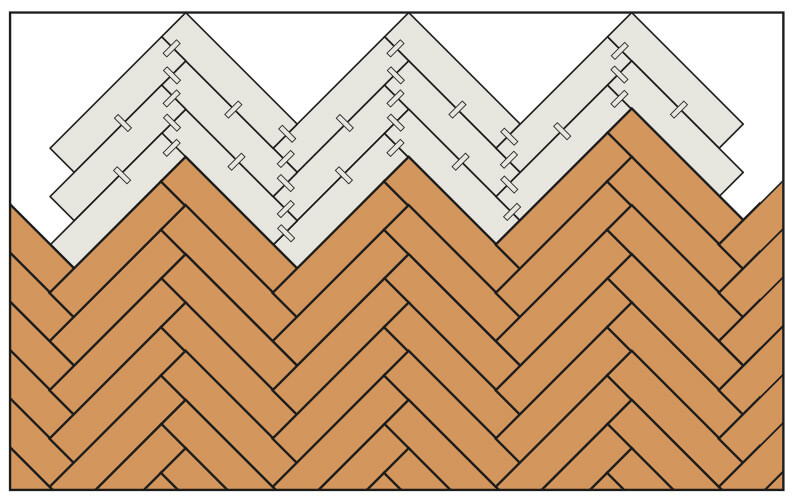
6. Once your layout is holding steady, remove the taped-together strips and continue fitting the rest of the floor tightly against your starting wall until your beautiful herringbone floor is complete!
Once complete, wait at least 30 minutes before walking on the floor and 24 hours before placing furniture/rugs or cleaning your floor.
Self-Adhesive Underlay Method
Note: If your room is no bigger than 100m² or extends no more than 10m in length, leave a 2.5mm expansion gap between the underlay/flooring and the walls around the perimeter of the room.
If your room is more than 100m² or extends more than 10m² in length, you’ll need to increase these gaps by 5mm.
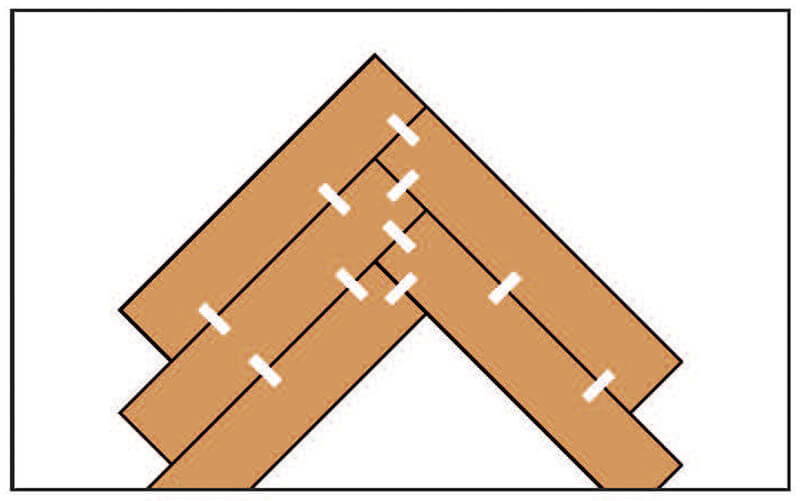
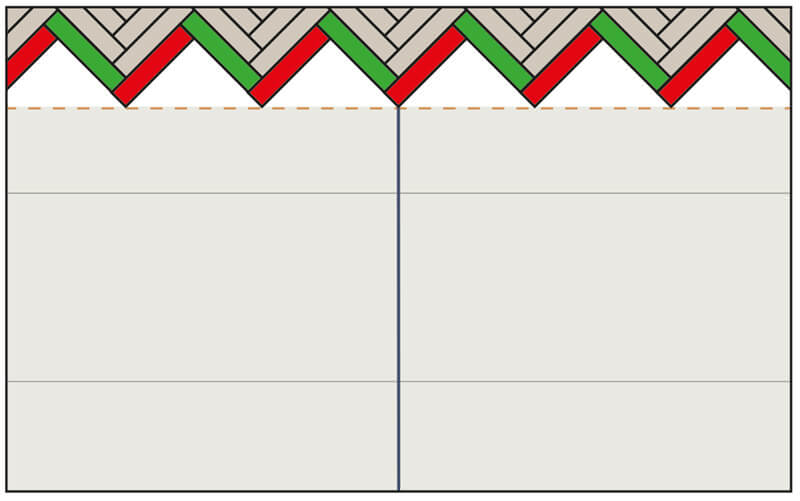
1. Begin by aligning your tiles as shown in the guide image, making sure there are no gaps or overlaps between pieces. Secure them tightly together with tape so they stay in place. Remember, herringbone flooring relies on accuracy. Even the tiniest gap will repeat and grow as you continue laying the floor, so check every join carefully.
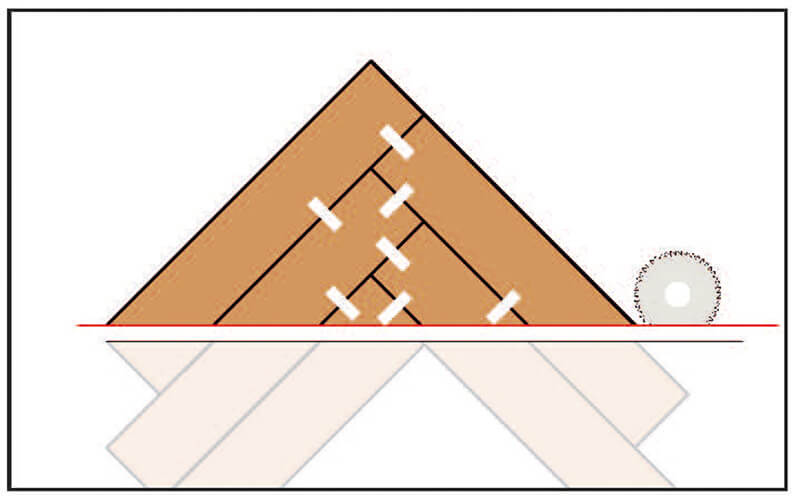
2. Cut along the red guide line (shown in the image above) to create your starter triangle. Keep the remaining tiles below the cut, as you’ll use these for the final row later on. Every starter triangle should be the same — three tiles on the left and two on the right. Don’t stray from this pattern or you’ll run into problems later!
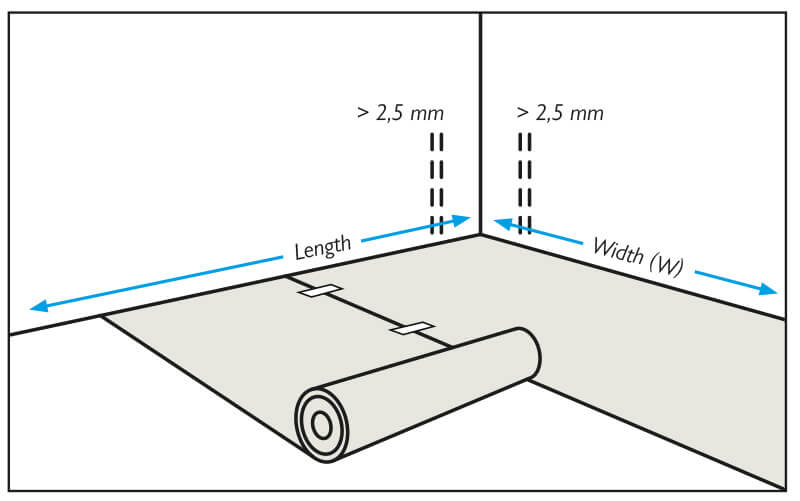
3. Cut your self-adhesive underlay to size using a utility knife. Lay it across the width of the room with the protective film facing upward. Leave an expansion gap between the underlay and the wall (see the note on expansion gaps in the box above), then tape the joins (using underlay tape) to stop the strips from moving while you work.
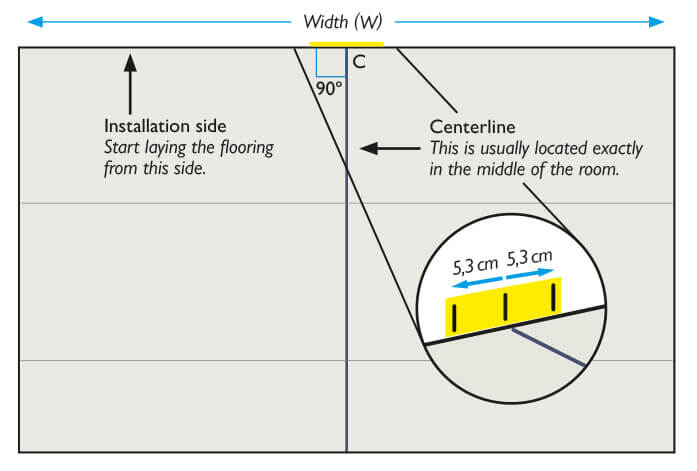
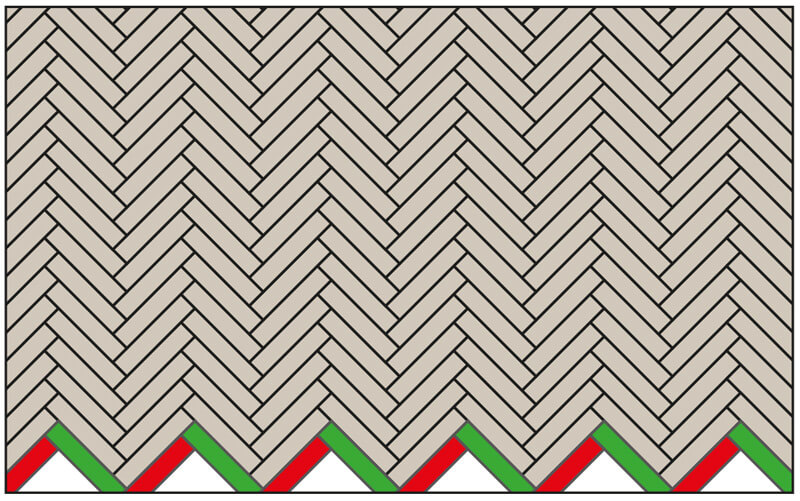
4. Use a marker to draw a centreline straight down the protective film — this line usually runs exactly through the middle of the room. Note, this is not the same as the ‘installation line’ in Step 8. Mark the same point on the wall with a small piece of tape (labelled ‘C’ in the image above) to make sure you always know where your centreline is. Add two more marks, each 5.3cm away from ‘C’, one on the left and one on the right (see the image above). These will help you position your first triangle perfectly.

5. To find out how many triangles you’ll need, take the full width of your installation area and divide it by 106cm, which is the longest side of the triangle.
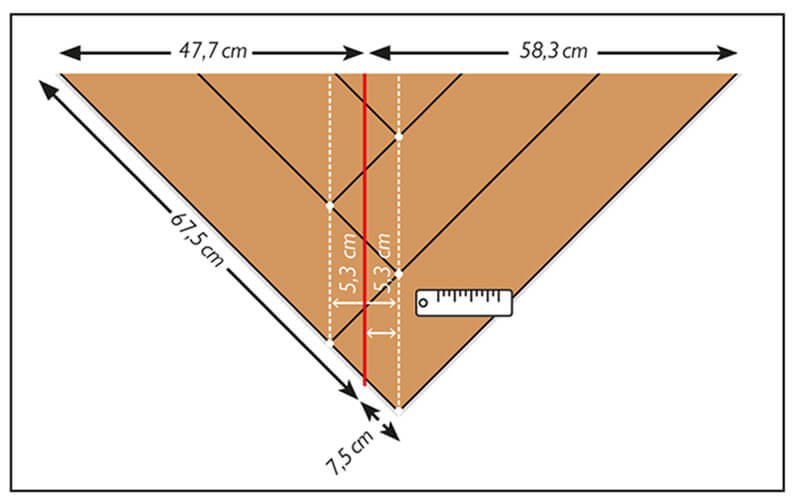
6. Identify the installation line on your first triangle (shown in the image above). This is the centre of the herringbone pattern (not the very tip).
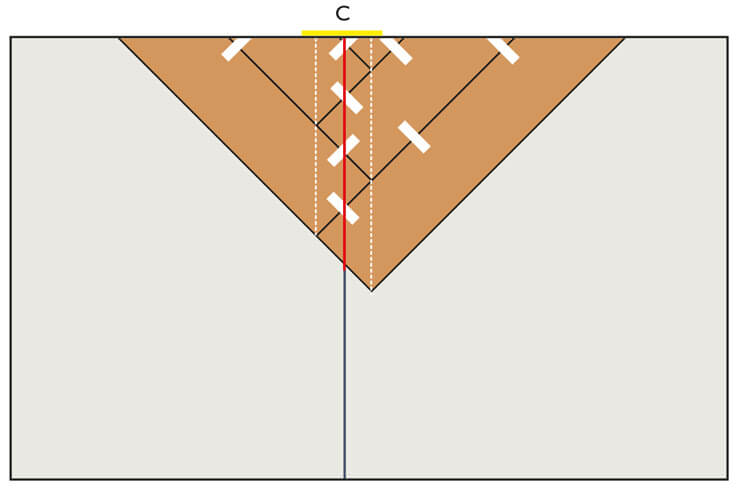
7. Position the first triangle so its installation line aligns exactly with the centreline of your room, using your ‘C’ marker as a guide.
8. Gently peel back the protective film from the underlay along the centreline and make a small cut to expose the adhesive. Peel back just enough film to place your first triangle, then press it carefully into position on the adhesive layer, making sure the installation line aligns with your centreline.
9. Repeat the same process for the triangles on the left and right sides, keeping everything perfectly aligned. Replace the protective film over exposed areas to protect the adhesive from dust. Don’t walk or kneel on any uncovered adhesive — this can affect its grip and the final finish.
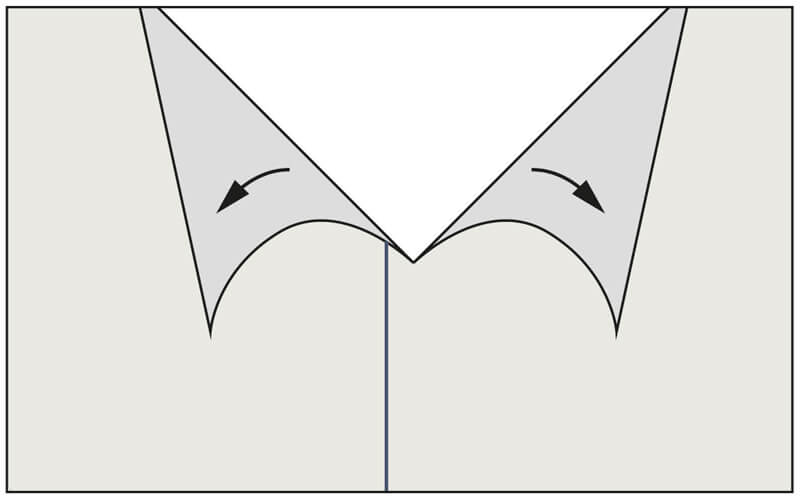
10. Continue filling in both sides of the centreline, trimming the last triangles neatly to fit using a utility knife. Once the first section is secure, pull the film back a little further and start laying the tiles one strip at a time. Keep each piece tight and straight — even a small misalignment here could affect the overall result.
11. Keep the centreline visible as you go and check that your layout remains straight across the room. You can adjust tiles within 10 minutes if needed, but try not to reposition them more than twice to avoid weakening the adhesive.
12. Once you’re close to finishing the room, wait at least 30 minutes before walking or kneeling on the floor to fit the final tiles. When you reach the final strip, use the offcuts from your first triangles to fill in the last gaps neatly.

13. We know it’s tempting to start using your new floor straight away, but it’s important to allow the adhesive to dry for 24 hours before placing furniture or cleaning your floor!
Finishing the Look
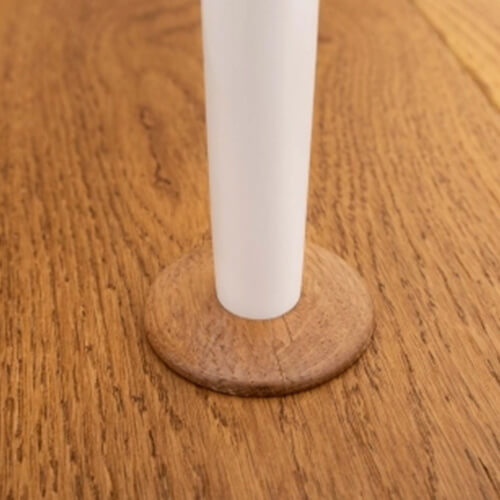
To fit your luxury vinyl tiles around any pipes, first mark the position of the pipe in the board you’re using. Drill a hole in this position and make two angled cuts with a saw. These cuts should form a wedge from the edge of the board to the hole, which can then be removed. Fit the board around the hole and then reattach this wedge with adhesive behind the pipe so the tile appears intact.
For fitting around door frames, start by removing the door from the frame. Line up an offcut of flooring along with a threshold bar stacked on top to make sure it will fit underneath the architrave. If needed, use a handsaw and chisel to trim the bottom of the architrave to the correct height. You may also need to trim the bottom of the door before refitting. You can then use matching beading and thresholds to cover expansion gaps and blend the new floor in with your existing walls, making it look professional and seamless.
Any spare tiles or cuttings can be kept in case any repairs need to be made.
If the expansion gap has been left too large and the skirting or moulding doesn’t cover it, you can use spare floor tiles to cut strips using a hand saw and glue these strips into place.
Forgotten something? It's not too late to order these...
Your Flooring is Finished!
After putting in the finishing touches (like our range of beautiful radiator pipe covers, skirting boards, stair nosing, and door profiles), you can introduce your furniture, stand back and take it all in. You just fitted your very own Luxury Floor!
We’d love to see your floor in action! So, make sure you take plenty of pictures and post them online @luxuryflooring on Instagram. Tag us #MyLuxuryFloor
We hope you’re happy with your new Luxury Vinyl Tile Flooring but if you have any questions or issues, don’t hesitate to check out our advice centre or get in touch with our customer support team on 0333 577 0025.